Would you like to find out how to create an interactive image with Hotspots in WordPress thanks to Elementor and Essential Addons?
The image is an excellent tool for transmitting information. Everyone knows that information conveyed through the image — and the visual form as a whole — is easier to understand and remember.
In the context of the web, you can use many image formats. From an infographic, a photo, a comic strip, an illustration, etc….
If you want to create web content such as the anatomy of something, city landmarks, maps, or directions, image building with Hotspots can be a great idea.
The idea of this type of content is to provide an interactive image that makes it easy for your readers to understand the information you are conveying. You can add Hotspots on an image that contains a tooltip on each Hotspot. Here is an example.
If you have a website based on WordPress, creating an image with hotspots isn't too hard to do. You can create one using the module Essential Addons .
What is the Essential Addons module?
Essential Addons is an Add-on toElementor. This is one of the most popular mods with over 2 million downloads. This add-on adds around 60 additional widgets to your Elementor.
One of the widgets offered by Essential Addons is EA Image Hotspots which you can use to create an interactive image. Essential Addons itself is a freemium addon, but you must use the pro version to create images with Hotspots because the EA Image Hotspots widget is only available on this version.
How to use the Essential Addons module to create images with Hotspots
First, you need to install Elementor and Essential Addons modules on your WordPress. You can get the pro version of Essential Addons on its website official. Whereas for Elementor, you can use the free version.
See also: How to Use a Global Widget in Elementor
The free version of Elementor is available on the directory of the WordPress Plugin so you can install it by typing “elementor” on the plugins installer search box (Plugins – > Add).

Once Elementor and Essential Addons are installed, create a new page (Pages – > Add) or a new item (Items – > Add) and edit it with Elementor. You will be redirected to the Elementor editor after clicking the button Edit with Elementor.

Before creating the images with hotspots, you can set the layout first. To do this, open the page settings panel by clicking the gear icon in the lower left corner of the left panel.
Read also: How to Use Elementor's Posts Widget
Set the layout on the drop-down menu Layout

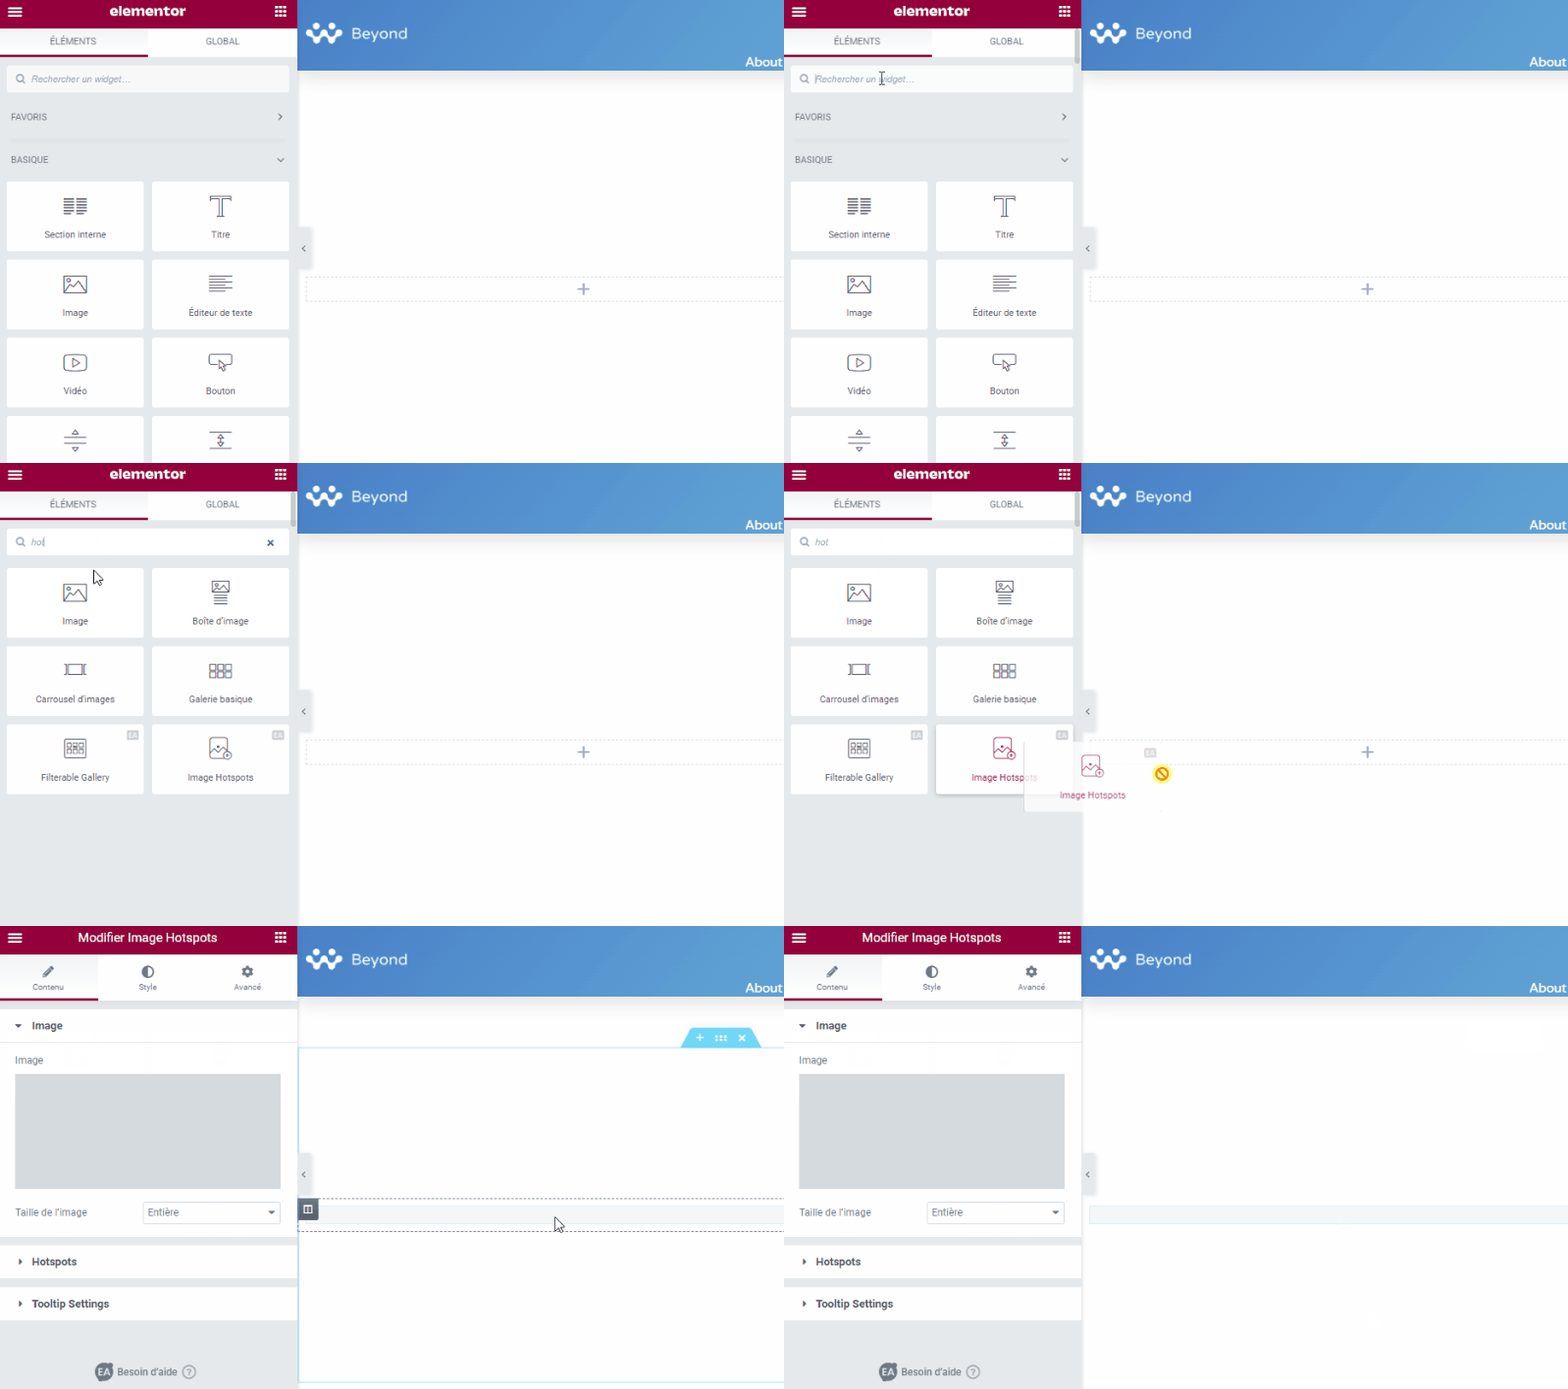
Add a new section by clicking the plus icon in the edit box and add the EA Image Hotspots widget from the left panel.

Add your image by clicking on the image picker in the left panel.

open option Hotspots on the left panel to add the access points. By default, the EA Image Hotspots widget contains a hotspot. You can click on the default access point to edit its contents.
By default, the access point type is set to Icon. You can change it to texts or leave Vide if you wish it.

Click on the tab POSITION to set the position of the access point. Set the X and Y positions by dragging the sliders.

Click on the tab TOOLTIP to add the tooltip content. Activate the tooltip and add your content in the editor. You can also set the position of the tooltip, either top, bottom, left or right.

To add more Hotspots, just click the button ADD AN ELEMENT in the section Hotspots and repeat the above steps to set the hotspot position, tooltip content and tooltip position.

Open the section Tooltip Settings to set the size of the tooltips and the animation effect.

Now go to tab Style to style your hotspots as well as tooltips. First, open the option Image to set the image size.

Open Section hotspot to customize hotpots. You can set the size, icon color (or text depending on the hotspot type you have selected), background color, border radius etc…
Discover also: How to Add Related Items in Elementor
Open the section tooltip to customize tooltips. You can set background color, text color, typography (font size, font family, font style) and width.
So far you have successfully created images with hotspots. You can play around with the left panel to customize your images with hotspots until you are happy with the result. Once you are done, you can click the button PUBLISH to publish your page.
Add images with hotspots to Gutenberg
If you want to add images with hotspots as support material for the article you are working on, you can integrate it with Gutenberg (the default WordPress editor) using the plugin Elementor Blocks for Gutenberg. This plugin allows you to use an Elementor template as a Gutenberg block.
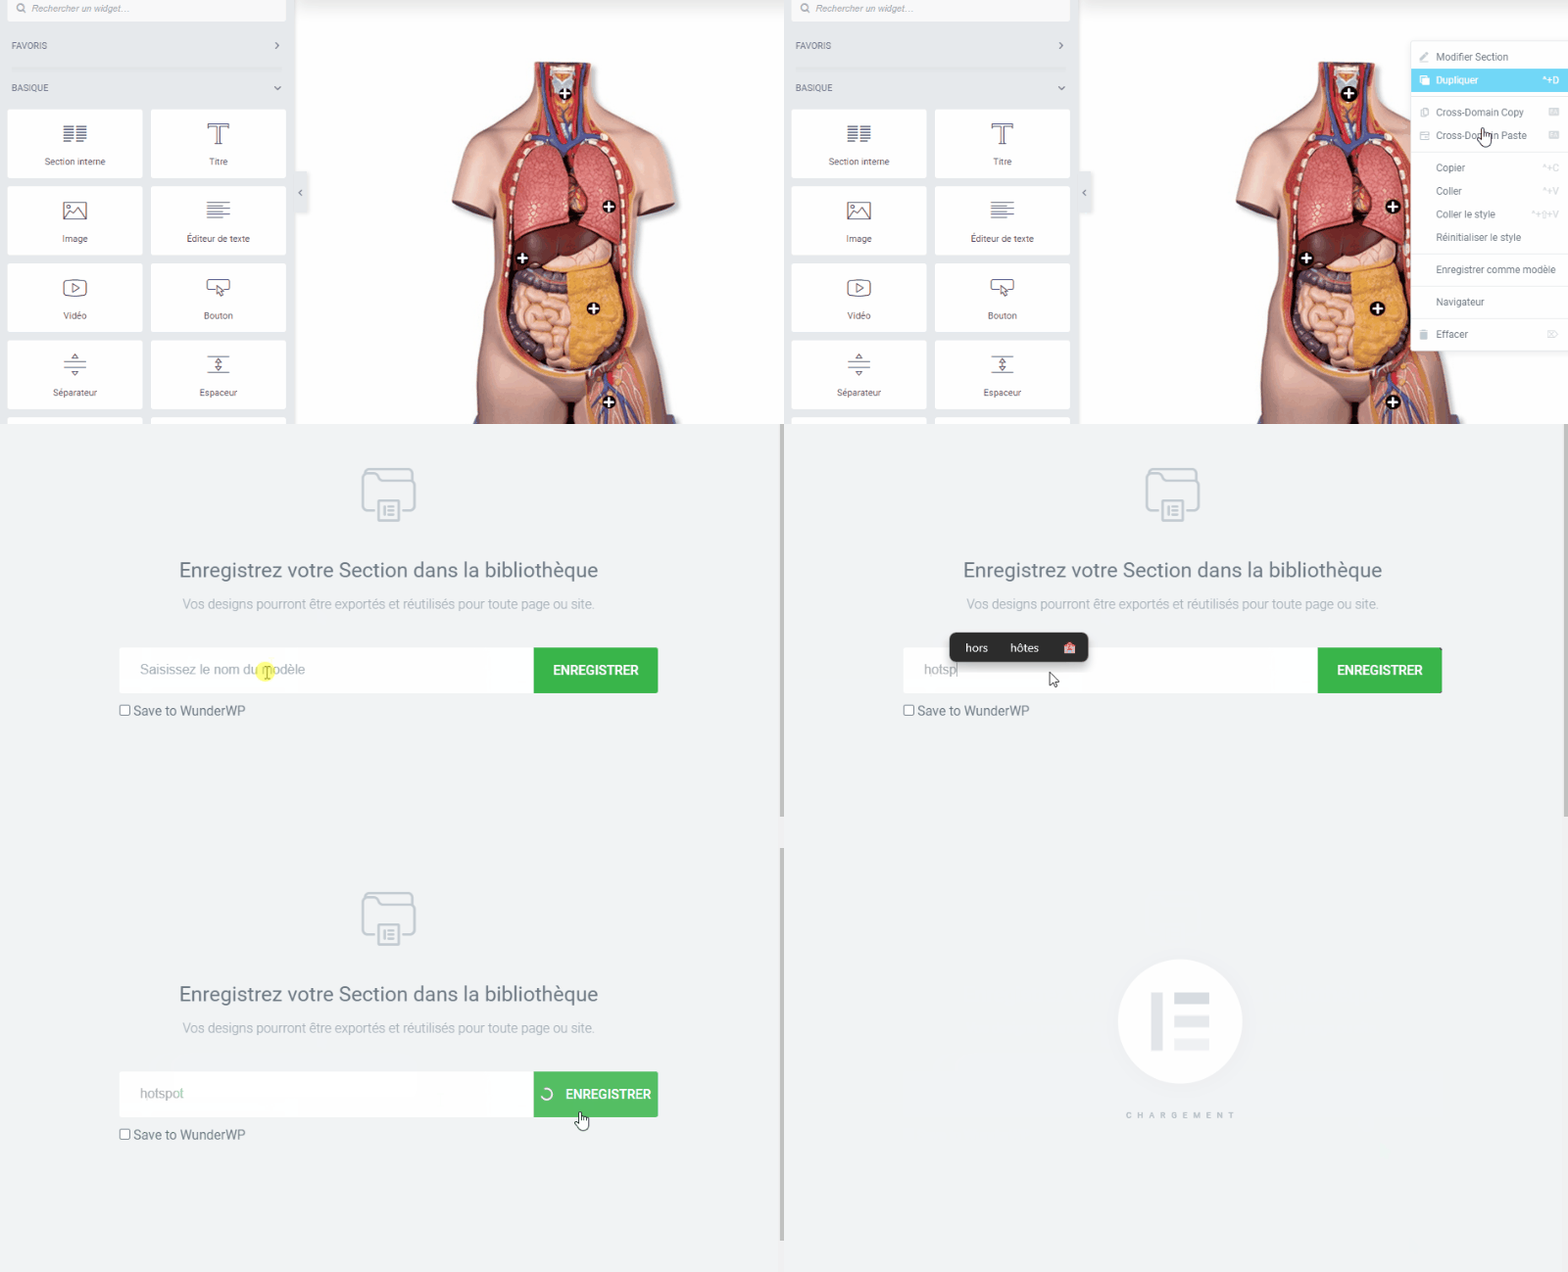
To save the images with hotspots above as an Elementor section template, right-click on the section handle and select Save as Template.
Give your model a name and click on the button RECORD.

Open the article where you want to add images with hotspots. Add a new block, select Elementor Library and select the image template with hotspots you just created.

Get Elementor Pro Now!!!
Conclusion
Here ! That's it for this article that shows you how create an interactive image with Hotspots in WordPress thanks to Elementor and Essential Addons. If you have any concerns about how to get there, let them know in the Comments.
However, you can also consult our resources, if you need more elements to carry out your projects of creation of Internet sites, by consulting our guide on the WordPress blog creation or the one on Divi: the best WordPress theme of all time.
But meanwhile, share this article on your different social networks.
...


